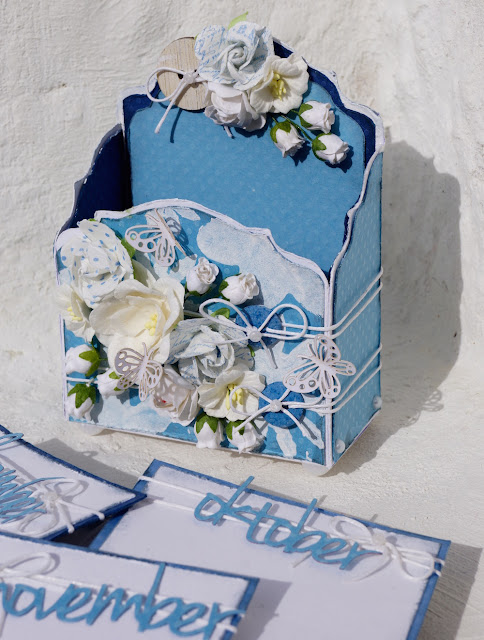
Hello Everyone <3
It is Wednesday and I am a Guest Designer for Noor! Design <3
This time I have made a step by step explanation on how you can make your own Birthday Calendar. By using a template - Box Art a4 Baroque and turn it in to a box <3
This is actually the first time I used a template to make a box ;-)
The explanation is below the images :-)
STEP 1:
Here is the Box Art a4 Baroque. I used to make my Birthday Calendar.
STEP 2:
Use the template to draw around over white cardboard or in the color you want. After, you use scissors to cut it out.
STEP 3:
When you have cut it out, use a bone folder and score on all the lines on the back side of the box.
Use a bone folder to make the embossed more visible. This makes it easier to assemble the box.
STEP 4:
Now I'll decorate the walls outside of the box.
I have a light blue cardstock with small dots on it.
To get the right measurements, I use the template and draw on the cardstock.
STEP 5:
Now I cut on the line and measure it on the white cardstock, so I get the right length.
STEP 6:
This is how it looks when it is measured. I've adjusted with scissors at the top to get it to fit.
STEP 7:
You use the template to all parts of the outside of the box to get the right cut and shape. Then use the scissors to make the edges distressed.
STEP 8:
Now I ink all the edges.
STEP 9:
On the side facing forward and also the backside of the box, I created floral patterns. By using a flower patterned stencil and gesso.
STEP 10:
This is how it looks when it is finished.
STEP 11:
I attach all sides with double sided tape before I glue the box together.
Then you end up with such a box like the picture.
STEP 12:
On the inside of the box, I used a dark cardstock with dots on. To get the right size. I've used the same technique as I have done on the outside. I've distressed the edges and inked them before I put them on with double sided tape.
STEP 13:
Now I create the card that will be inside the box.
I have 12 blue squares, measuring 8,9 x 8,9 cm
and I have 24 white squares measuring 8,3 x 8.3 cm.
All squares are distressed and inked.
STEP 14:
Beneath the white squares, I attach the double sided tape.
STEP 15:
Then I attach two white squares on to one blue square. One on ether side of the blue square.
Then you have plenty of room to write down the Birthdays to your friends and loved ones.
STEP 16:
Since this is a calendar I used the set of dies from Noor! Design, with all the months. I used the bright blue cardstock, the same cardstock as I used on the outside of the box.
STEP 17:
I use white wax thread around the cards and make a bow with a small button on. Then I attach the months on the top with glue.
STEP 18:
This is how the box turned out when finished <3
On the final box, you can see how I've decorated the box.
On the outside, I have attached half pearls in the corners and under the box.
On the front of the box, you can see the flowers, butterfly and buttons that are fastened with wax line all the way round with a bow in the front.
On the back of the box, I have attached large pearls as the center of the flowers <3
All the months will fit in the box without any problems.
Here is the box without the cards.
Now you have seen my Birthday Calendar based on the template that can be used for many projects.
A little while ago Tracy made a fantastic Christmas box with the same template and you can find it HERE <3
I hope you are inspired to create a calendar for yourself. Link to the products are available below <3


very nice
ReplyDeletelove this
thank you for tutorial
hugs
Thank You so Much <3
DeleteWow!! I love your creation Silje, thank you for the tutorial. Hugs Suzi x
ReplyDeleteThank You so Much, Suzi <3
DeleteWow, lovely idea!!! Thanks for sharing!!!
ReplyDeleteHugsss, Gaby
Thank You <3 and no Problem Gaby <3
DeleteStunning design! Creative Blessings, Tracy x
ReplyDeleteThank You so Much Tracy <3
Delete