Pages

Wednesday 24 December 2014

My CAS Gift Bag!!

Hello Everyone,

So I gave you a sneek peek of what I had started to work over on the Facebook page, so thought you might like to see the finished product.

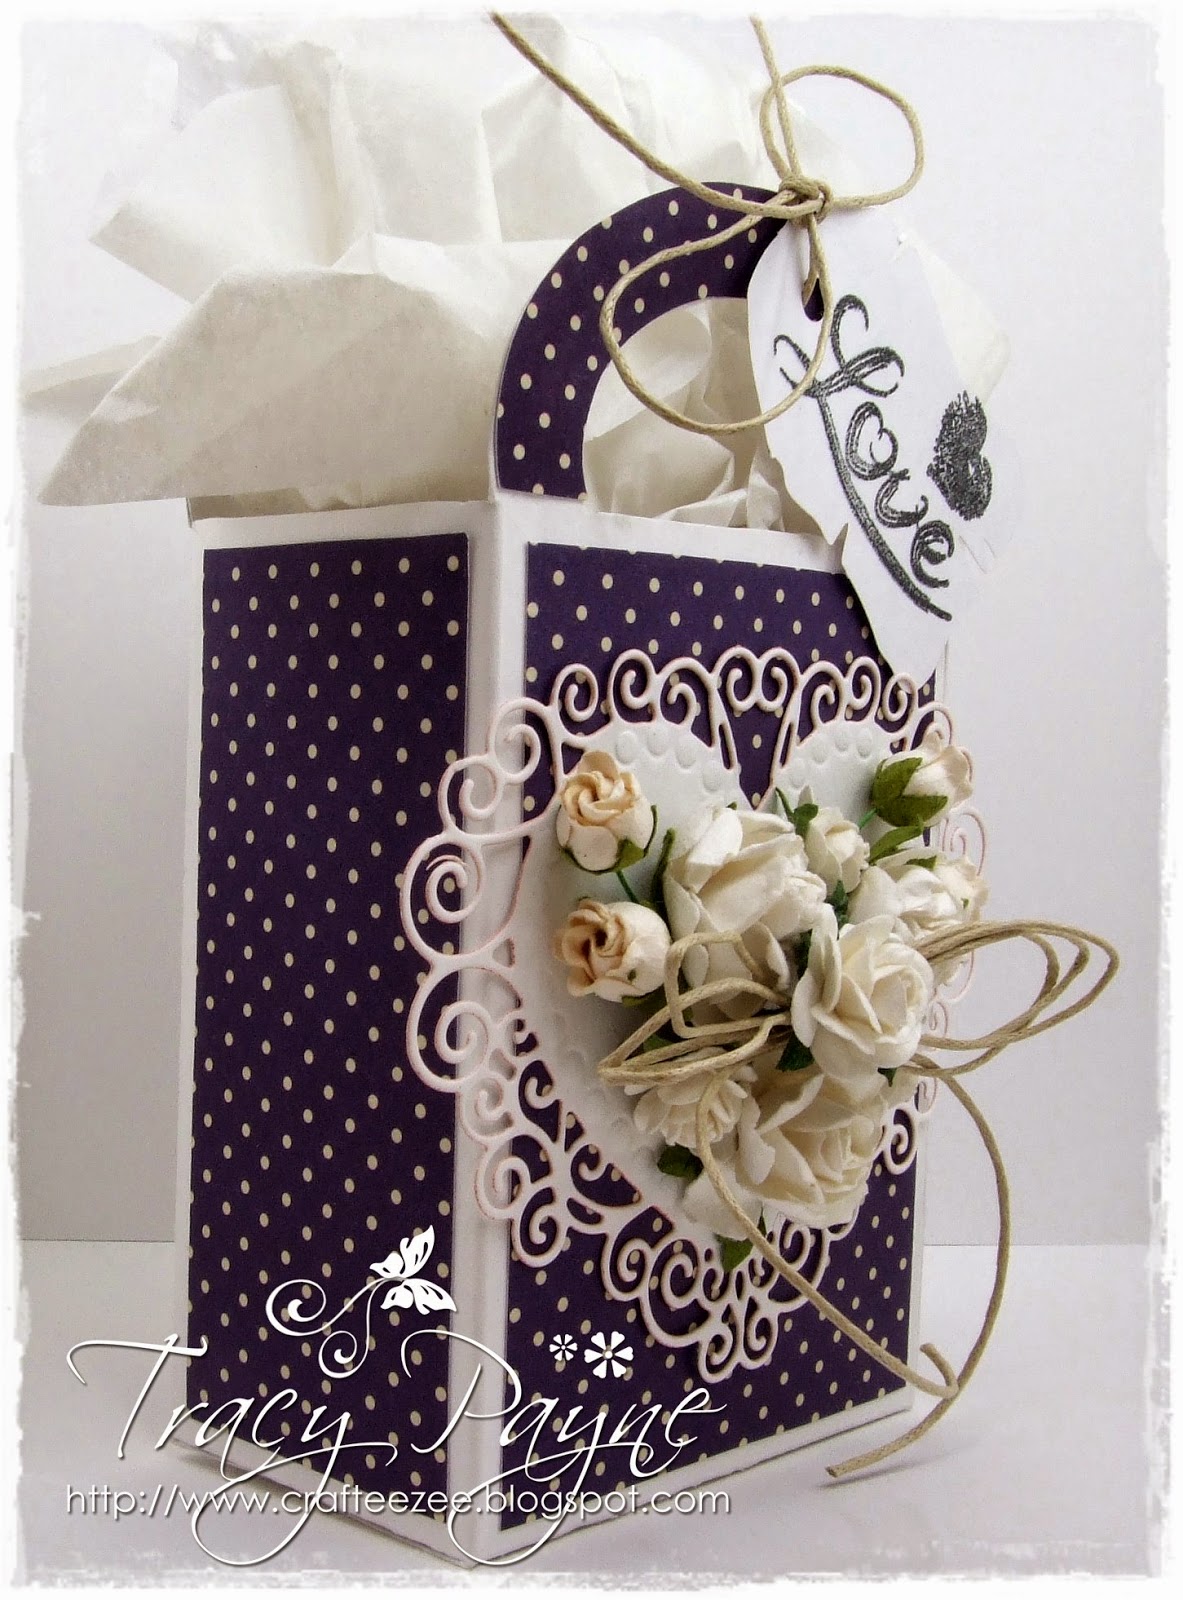
The Dutch Doobadoo Bag Stencil is really easy to use and takes minutes to draw, cut and glue.  It is also a stencil for the panels on the front/back and sides and as you can see on the stencil itself  you could add an Oval shape or a Heart shape two, all in the one stencil and available for only £4.40.

The paper pad I was using is the latest Shabby Chic Pad and I decided to continue with just the purply blue spotted paper, I do love spots, and keep the bag quite simple.


And here it is............


The beautiful, beautiful heart is from the latest release and comes with a mini heart with wings, which is gorgeous too and looks fabulous at the top of a little tag.


Here's  the side view, you see I kept it quite simple but elegant I think, but it does show off the beautiful heart.


The tag is a Dutch Doobadoo Paper Art Tag and I stamped the sentiment and heart from the latest Sending Love Stamp Set.  


I'd like to take this opportunity to thank everyone for your help and support over the last couple of months and to wish you all a Very Merry Christmas and a Happy New Year


The products used can be ordered in the Noor! Design U.K. webshop:

Tuesday 23 December 2014

"Love"


Hi everyone, Keeley here, I've been having a play with some of the Dutch Doobadoo products!

These are fabulous and can be used for any occasion!

Here's how I made it... I started by drawing around the Template onto a sheet of Co-ordinations Card, then I used the Mask with a sheet of regular printer paper and embossed it, how cool is this it looks fab!

Just have the mask on the bottom of you cutting plate, paper on top then rubber mat and top cutting plate, run it through your cutting machine and here you have it, a beautiful embossed masterpiece! 


I then added some jute, a button and a Doobadoo Paper Art Label and Stamped Love from the Sending Love collection. 


Die cut the heart with wings and XoXo wording from the Sending Love Dies collection


I stamped a small heart again from the clear stamp set, used matching ink and added
 bit of form pad to give decoupaged look  

and finished off I cut a scalloped heart out and hung it on the side with some more jute.

I have added structure paste for dimension, but I think I went a crazy with it!

Well I hope you like my creation and have inspired you to have ago yourself, all the products can be found below and don't forget you can still order if the stock is showing zero, Tracy will order it in for you.

For more information, check out our Facebook page.... this will keep you up to date with all the latest info and you may just get to see some sneak previews to get your taste buds going!

Hugs


Monday 22 December 2014

My First ATC's

Morning Everyone,

Today I want to share with you my first ATC's.  Jolanda has rekindled the ATC craze and created an Artist Trading Noor!Design facebook group.  I have never made one before so Jolanda challenged me.  Well what can I say, they are tiny and you know how I like to embellish my cards so I brought a little of my shabbiness to ATC's and rose to the challenge, lol.

If you want to join in the fun the Facebook page can be found HERE.  You can create one or a collection. They measure 3.5 inches by 2.5 inches. The Facebook Group already has loads of inspiration and of course all using Noor products so is worth a visit.  So here's my take on ATC's........


I love the Sillouette Stamps available at Noor!Design UK so this was the ideal opportunity to create a collection using the images.  The beauty of these is that you don't have to colour them if you don't want to.  They look stunning in black and white or you can add a splash of colour or even stamp with versaink and colour with chalks or pan pastels.  Lots of options available with these stamps and what I actually did was stamp them with staz-on ink onto white shrink plastic and heat them until they shrunk so now they were the perfect size for my collection of ATC's.


I cut two ovals for the ladies with hats before shrinking.


The same but different?  I used the same image but on the first rectangle I left some white space to the right before shrinking and on the one on the right I cut around all the leaves and flowers before shrinking.  This gives it a slightly different appearance.


I have used the latest shabby shic paperpad.  The Carpe Diem word is also from the latest release.  All links at the bottom of this post.


Just poking through on the top left you will see a grey paper from the Winter Wonderland pad.  I used the Dutch Doobadoo Heart Stencil and structure paste to create the heart background.  Still in love with structure paste and stencils :)

The leaves were cut from my favourite Vintage Flourish Leaf Die but have you seen what's coming in January....... ummmm two yummy new leaves to add to my collection.


I also cut one of the Rolled Roses and added to the stem of the leaves with added some tiny berries in the centre.


The butterflies were made using the Dutch Doobadoo paper art butterfly sheet.  So intricate and delicate.  The larger of the two was coloured using distress inks, soooo quick and easy and layered with a plain white smaller butterfly.


Here's the two ladies with hats, aren't they fabulous.


And one last look at them altogether.

Don't forget if you want to join us on the ATC Facebook page we'd love to see you there :)


Hugs Tracy x

Follow Me on Pinterest

The products used can be ordered in the Noor! Design U.K. webshop: