Pages

Showing posts with label DT Member Vicky. Show all posts

Tuesday, 27 June 2017

Anchor's Away

Hello everyone how are you all?
Hope you all had a lovely weekend, we had a really nice one, out with all the family & both the family dogs on Saturday & then spent the day with family again on Sunday & had a BBQ at mine, love weekends.

Ok less babbling & lets show you what I've made with products from Noor Design UK. Today I have a more male inspired card for you.........yep less foofiness lol. I sometimes find male cards hard but I do think Pion Design make male cards easier with their gorgeous papers.

Excuse my photo's I'm in the middle of re-designing my craft room & have not set up an area for my light tent & lights yet, so this is took with my main lights on & we fitted LED lights under the units which help sooooo much, especially when crafting.
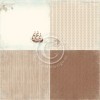
I love this collection.....ok I love most of Pion's collection lol. This collection is 'Legends Of The Sea' but the 'Happy Birthday' tag is from the Mr Tom's Treasure's Collection.
All links are below to take you to the products I've used

For the centre I used an 'Anchor' image from Images From The Past & added foam pads underneath to raise it up. Under that I cut out a rectangle using a Fantasy Die from the same sheet I used for the card which is 'Aye Aye Captain' & raised that too to give it all dimension.

The boat at the bottom I fussy cut from the Aye Aye Captain sheet & popped it onto foam pads & underneath I cut out seaweed from Foamiran.
The Anchor, Lighthouse & Seagull are cut from Joy Crafts dies.

The tag I cut from Pion Mr Tom's Treasures 'Mr Tom's Memory's Notes'. I punched a hole through it, added an eyelet & then a keyring from my stash hooked onto a Tim Holtz Clip.

I cut the corner from a Joy Crafts corner die. I also added bubbles here & there using Structure Paste & a mask art stencil that Tracy can order in if you would like it.

Thats it form me, thank you so much for stopping by.
Lotsa hugs Vicky xxx


The products used can be ordered in the Noor! Design U.K. webshop:
Tuesday, 30 May 2017

For My Best Friend

Hello everyone hope you all had a fabulous weekend. To all those in the UK hope you enjoyed your long weekend.
I'm here today with my post for Noor Design UK & I'm here with another shabby chic kind of card.....not so much shabby though lol. This time pink.
I've also tried out another new flower die on the foamiran..........OMWord I love it.....
I've also used a new paper pad that is new to Noor Design UK, all links to items used are at the bottom of the post.
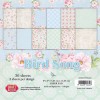
The pad is Craft & You 'Bird Song' which is so pretty, so soft & full of pinks, blues & greens....all soft & pastel. Of course I machine stitched around the edges as always.

The flowers I made myself from a new die by Whimsy Stamps & this die set was designed by our lovely crafty buddy Bev Rochester. Its fab, honestly its gonna be my favourite Foamiran die & so so easy. You can either have your Peony Roses closed in or I like mine with the leaves spaced out... 
I used pink & white foamiran for the flowers & used Pentel oil pastels to add colour.....
The leaves I used green & then added colour again with the same oil pastels.....leaves are not one colour. I used pink & white stamens in the centre.
You really should try out these dies they are awesome!!!
I used all 3 sizes on my flowers & did big, medium & small peony flowers. I also used the leaf die that came with it.
What is also fabulous is they make a wee little hole in the centre of each flower to put your stamens through.......I didnt think this would make much difference but seriously soooooo much easier.

I've been digging through my Scrapiniec & added bits of that, the bird is form my stash. I also cut a piece of lace off & scrunched it up to make another flower at the top next to the larger peony flower.
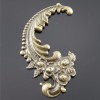
The Antique Bronze Leaf Swirl peeking out form the bottom flowers I gave the ivory frantage treatment to soften the bronze but I wiped some off before heating it so I still had some bronze peeking through.

Well thats it from me, thank you so much for stopping by.
Lotsa hugs Vicky xxx


The products used can be ordered in the Noor! Design U.K. webshop:
Tuesday, 23 May 2017

Pion Design With Love

Hello everyone how are you all?
I was hoping you to show you a project this week with in depth photo's or maybe even a video of the making or part of. However my daughter got took into hospital & although she is home now she is still very poorly. Also my eldest son & family moved at the weekend so I was looking after my grandchildren as well as my poorly Natalie & well there are not enough hours in the day.

So I will show you that next week as I'm really looking forward to doing it. Today though I have some shabby chic for you......oh my I love shabby chic........I would have it everywhere........even hubster would get the shabby chic treatment if I could get away with it lol.
I used the oh so pretty Pion Design 'My Dearest Sofia' papers, I went with blues for this one with just hints of pink in the background.
I have also used bits from the Crafteezee Collection No.9 which I think was March Elegant collection......but I'm not certain :-(
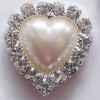
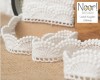
The 2 hearts in this photo are from the Crafteezee collection, the lace heart is lace & you get a long length of it but I just cut 1 heart off.....you may end up seeing these lots lol
The small metal heart I added Ivory Fran-Tage embossing powder to it but before I heated it with my heat gun I rubbed off little bits here & there so a bit of bronze would still peek through.
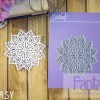
I also cut out 2 doilies, 1 in white card using a Fantasy die & the other from Pion paper with a Marianne die...........these are 2 of my favourite dies........amongst many others lol.

This little wooden peg with a heart on was also from the crafteezee collection....I added white gesso to the wooden peg & then stamped a postage stamp on the half of the heart.......its not showing up very good in this picture. I stamped onto paper first to get a lot of the ink off as I wanted it light.

I love the metal leaves but sometimes I think they dont really go with my card..........so I added Fran-tage embossing powder to both sides & heated them with my heat gun.........be careful & use tweezers as they get very hot with being metal.
Now I absolutely LOVE them & will be buying lots & giveing them the fran-tage treatment lol.
For these I used Ivory Fran-Tage to match the smaller metal heart in the previous photo.
I used some gorgeous flowers & I used quite a few different leaves. I used the metal ones & I used 2 different Rosy Owl Leaf dies & I also used Tim Holtz Holiday Greens.......I think a couple of the dies in this set you can get away with all year round. The Tim Holtz ones I cut with the blue 12x12 Pion Sheet, Rosy Owl was cut with the green 12x12 pion sheet & the maja design sheet & also white cardstock..... I also added some heat treated organza ribbon in there as well.

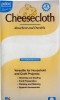
I added cheesecloth between the first & second layer & I also added 2 different laces. I distressed all my edges with a Tim Holtz tool.

Well thats it from me dont forget about our current challenge which is 'Add Lace' here.

Thanks so so much for stopping by it means a lot to us.
Lotsa hugs Vicky xxx


The products used can be ordered in the Noor! Design U.K. webshop: