Pages

Showing posts with label Pixie Blossom. Show all posts

Sunday, 10 December 2017

A winter card with snow globe

 Hello everyone!

I am totally a person for warm and sunny weather. In winter, when it's snowing, an icy wind is blowing I love to look out my window and enjoy the nature but I don't really like being outdoors. But when it comes to crafting I love to add a lot of frost to my creations. And so I also added some to the card I am sharing with you today.


For the base I used one of the sheets from the Winter Feelings #59 paper pad by Studio Light. It's full of fun and frosty designs. To add even more frost I used Frantage Chunky White on the edges to add a frost pattern.

Across this paper I've put a piece of the Rebecca lace.


As the main element of my card I didn't go with an image this time but this snowglobe. It's made using the snowglobe die by Joycrafts. I've die cut the houses from light and dark grey cardstock and added another layer of white for some snow. The paper with the falling snow is another sheet from the Winter Feelings paper pad. I also added a few of the stars confetti here.

The frame and the bottom of the snowglobe were cut from silver glitter cardstock. It goes so great with an icy color scheme. To make the delicate pattern of the bottom pop out a bit more I used white cardstock behind the bottom.


On the left side I've put some trees behind the snowglobe. I used the birch trees die by Joycrafts to cut them and a white gelly marker to paint in the details through the holes in the die.

This cute Tilda with Snowheart by Magnolia is an older image but I thought it goes so perfectly with my card, I just had to use her.


On the bottom right of my card I've used some turquoise wax cord, white pixie blossoms and some of the white 5mm glass stamen. I only used the ends here, glueing the directly onto my card. They remind of me of ice covered berries. 


On the top right I've put one of the Paper Art Labels by Dutch Doobadoo behind the snowglobe. It looks like  a moon to me and just fits into the scene. I've tied some turquoise ribbon to it and added more berries and a die cut star to it.

 Wishing all of you a happy sunday!
 Hugs, 
Kathrin

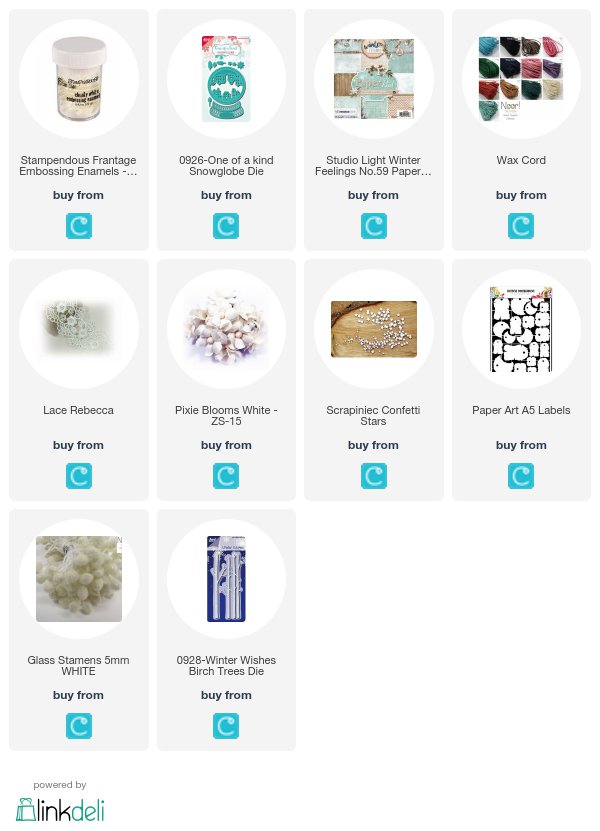
The products used can be ordered in the Noor! Design U.K. webshop:
Sunday, 26 November 2017

Wishlist

Hello everyone!

Have you all written your wishlist for christmas yet? This cutie I used on my card today seems to do a last check before he sends it off....

 I picked the wishlist theme as the all-over theme of my card. 

The background paper is one of the beautiful papers by Maja Design. I love those grey-ish blues and this one also has a print like falling snow. Also the green paper is by Maja Design. Inbetween those two I've put the background from the Clock with Snowflakes by Noor!Design. As you can see this is  not only great to be used with the clock but also makes a great and elegant background.


 This is the cute Wishlist image by Whimsy Stamps that inspired me to use the theme on my card. He's been colored in with Copics, the reindeer's nose and the christmas bauble are covered with Glossy Accents.


 On the right to the image I've added those grey-ish blue pixie blossoms and a metal leave.

Here you can also see the border with the green snowflakes and the circle with the snowflake printed in the middle. These were both cut from papers by Pion Design. A really fast and easy way to create decorations for your card that also all match in color.

Underneath the border I've also tucked in a die cut lace border, cut using the Flower Border die by Noor!Design.


On the left side of the image I've added a little wishlist. I've die cut the Notes die by Noor!Design here from brown cardstock and stamped a handwritten text on it. Then I used Frantage Chunky White on the edges - like I did on the edges of all the designer's papers as well.

Above the wishlist there was also room for this label with the yummy gingerbread hearts printed on. This label was also cut from a paper by Pion Design. 

Have  a happy sunday everyone!
Hugs, Kathrin

The products used can be ordered in the Noor! Design U.K. webshop:

Sunday, 12 November 2017

A fall-ish card

 Hello everyone!

Today I am sharing a card that has more a fall-ish look. I have made so many christmas cards already that I needed a break for them. And november is still fall, right? So, I sat down on my desk and this is what I ended up with:


I used the Card Art Window stencil by Dutch Doobadoo for the card base. It's cut from craft cardstock and then I've put some designer's paper from the Noor`s Favourite Paper Pad on the outside. 

The german text means "with you the world is a better place". I've cut it in a banner shape and put it across the bottom of my card. It's only glued down on the left side so the card can still be opened. Since the card didn't stay closed completly I've used two magnets. One is hidden under the designer's paper on the right half of the card, the other one is glued to the back of the banner. They now keep the card closed.


On the bottom left I've added some fall-ish decoration. I used some leaves from the Paper Art Autumn Leaves here and inked them up using different types of browns to give them a fall-ish look. I also added a few berries and a white Pixie Bloom here.


I drive my husband crazy with my need for symmetrie - not only craftwise. So to balance it out I also added some decorations to the top right of the card. It's made from Cheesecloth, an antique bronze heart charm and a bow from twine.
Sorry, I didn't realize the glue wasn't dried here when I took the picture - and when I did it was too dark already to get a decent one.


When the card is closed you can see a part of a scene through the cut out window. When you open the card you get a full look at the scene.

The inside of the card is covered with another designer's paper from the Noor`s Favourites Paper Pad.  I went with a blue one with dots here.


Here's a close up of the scene I created. I started with a die cut cloud in the back. The next layer is made from the Big Fence and Background die. I love how filigrane and detailed it is. 

I used two cattails from chipboard next and added a die cut flower to the right side.

All the other parts are made using the DooHickey Kit #16. I used the ladder in the set as a fence. And isn't that hedgehog a real cutie?

Since I didn't want the hedgehog feel lonely I added this fox stamp by Magnolia. It's out of stock in the store, but I am sure quite a few of you bought it and maybe I can give you some inspiration on how to use it.

I guess, next time will be a christmas themed card again - until then, have a happy day!

Hugs, Kathrin

The products used can be ordered in the Noor! Design U.K. webshop:

Sunday, 5 November 2017

A frosty winter card

 Hello everyone!

Winter is really close now - and I am looking forward to it! Well, now I'm saying that, let's talk about it in two months... 
I am a person who loves the sun and heat. But doing winter crafts is a totally different thing than having to stand outside in the cold shoveling snow. I like to use those light and icy colors. And that's what I did on today's card:


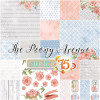
I went with light blue and white papers from the Peony Avenue series by Studio75. All papers got a white matting.

In the middle of the card I used the pergola die by Noor!Design. The lace I put across my card kind of looks like a  light layer of snow. It's lace Rebecca, which is double the height originally. Since that was too much for my card I just cut it in half lengthwise.

To the top right corner I've added a die cut winter text and a small heart shaped tag.


 Ice Tilda has bundled up to have fun in the cold. She's been colored in with Copics.

Next to her I've added a few embellishments: a die cut snowflake, a flower or grass thing that I have no name for, a light blue meadow spray, a white blossom and that Wilma button. With it's little blossoms and rhinestones it has the perfect look for my card.


 Behind the pergola I've put a large tree. This tree, and also the heart shaped tag and that flower thing I don't know how to name, are from the DooHickey Club Kit #16 by Magnolia. It has a fall theme but there are quite a few dies included that are perfect for winter cards as well.

I also added two snowflakes, put on top of each other, here.

So, let's wait for the first snowflakes. Have a happy sunday!
Hugs, Kathrin

The products used can be ordered in the Noor! Design U.K. webshop:

Sunday, 8 October 2017

Cup of tea anyone?

Hello everyone!
It's another sunday and with the weather outside it's the perfect day to enjoy a nice cup of tea - or coffee, if you are like me. ;) So tea is also the theme I picked for the card I want to share with you today:

 I went with designer's papers in different shades of blues. I love the lace print on those. I used light brown cardstock for the matting and added some white to my card as well. Did I mention I am not a very colorful person? ;)

There is some lace on the biggest piece of cardstock. Around the image I created a frame from white cardstock using the Blue Flower Border Die. 


This Teacup Full Of Wishes stamps by LDRS is a real cutie - but it gave me a hard time. Two stamped images went into the trash after I started coloring. And then I had the idea of stamping it onto craft cardstock, heat embossing it with white powder and only coloring in the girl and a few minor details like the hearts and the cherry on the cupcake. I also added a bit of a shadow around it.


Since the card was a bit plain still I was able to use bigger embellishments. That beautiful white flower is cut from the Gwendoline Lace - the longer parts dangling down from the flower were left on since I liked the touch those add. I also added two Pixie Blossoms, a metall leave and that cute teapot charm, that I tied to my card with some twine.

 To not only have all the decorations on the right side I decided I needed a few more on the left side. Here I glued a metall heart onto my card and then tied this cute miniature heart shaped glass bottle to it, which is filled with blue glitter.

 Enjoy your sunday, everyone!
Hugs, Kathrin

The products used can be ordered in the Noor! Design U.K. webshop:


Sunday, 24 September 2017

Fall is in the Air

Hello everyone!

Oh well, it's sad to say goodbye to summer. But looking outside my window I have to admit that it's really gone by now. But that also means fall with all its pretty colors has arrived. And those are what I used for today's card.


I love the mix of warm colors, of greens and reds and oranges and browns. Since I am not a very colorful person - not only in crafting but also in my home style, my clothing etc. - I still try to not overload my cards with colors. But fall just requires a special amount of different ones. And since they are all soft I am happy with it.

Don't you just love this paper with the leaves print by Pion Design as much as I do? It looks like the wind just whirled them all up.


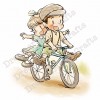
 This image by Dreamerland is such a happy one. I can imagine those two riding through piles of fallen leaves or puddles fall rain created on the streets.

They were colored in with Copics, trying to pick the colors from the papers.


I also created a little garden behind a fence that those two ride along. 

There's some lace on the paper, then a laser chipboard flower that reminded me of those beautiful fall asters. I've cut a piece of the wooden fence off and glued it on top of the chipboard. And can you go without flowers? I only used one white pixie blossom here but added a metall leave and two of the 5 mm glass steamens. They are not only great for putting into a flower, but also for using them just as they are.

 Enjoy your sunday, everyone!
Hugs, Kathrin

The products used can be ordered in the Noor! Design U.K. webshop:


Sunday, 17 September 2017

a summer-ish hello

 Hello everyone!

Today I have a card to share that is still a little summer-ish. To me, fall comes way too early this year and so I tried to make it last a little longer with my card.


 Those papers I used are so beautifully soft and light - exactly what I love! I picked up the colors of those papers when I did the coloring of my image. I needed to add some darker turquoise, just because I needed more colors but it's still in the same color family.


 This cute LDRS image is called "Parade". It's pretty big but with all the white on the top right there's enough room for decorations to cover that up. 


 And these are the embellishments I went with. As I mentioned, the image is pretty large so there wasn't room for too many and I didn't want to cover up the image. So I added this Antique Blue Pixie Blossom, that went perfect in color with what I used for coloring. Then I gave Foarmian a go - but I already see that I have a lot to learn. I see myself buying another iron soon to store in my craft room. To pick up the light colors from the papers I've added some wooden decorations and there's also a bow made from turquoise twine. 

Have a happy sunday everyone!
Hugs, Kathrin

The products used can be ordered in the Noor! Design U.K. webshop: