Hi, DT Henriëtte here today sharing a tutorial on how to make this
foamiran orchid branch.
I have a step-by-step photo tutorial on how I made this branche.
First I looked on the internet for a free orchid template.
There are a lot of templates or example on Pinterest. I used this one.
Before printing I did scale it down a bit.
With a wooden skewer I traced the cut out template pieces on white foamiran.
All pieces 5 times and then I cut them out.
For the 15 smaller leaves I used a simple leave template I drew myself..
With a baby wipe and oil pastels I added yellow colour to the centre part of the orchid.
(I think these parts of the flower are called the column and labellum).
Using a wood skewer and a ink pad I added the pink dots.
You can use other coloring media like chalks, inks or paint.
You can use other coloring media like chalks, inks or paint.
Then I held the foamiran pieces shortly against a medium hot iron.
While the pieces are still warm I pressed them on to a mold to get more texture.
You don't have to use a special orchids leave mold. Crafteezee has suitable molds
You shape the petals a little with your hands.
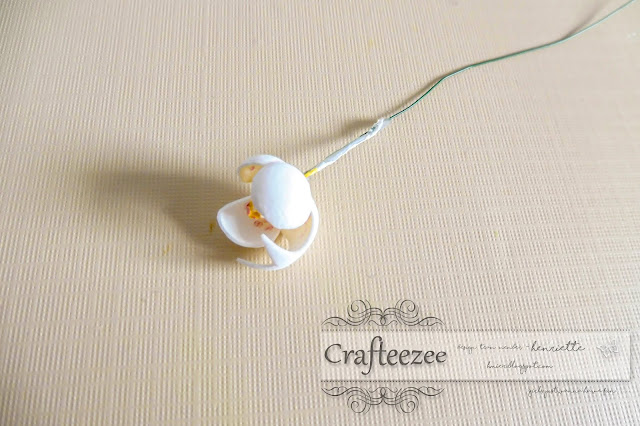
Using a heat gun I glued a single stamen on a piece of green wire.
I pricked a small hole in the centre piece and carefully pushed the wire through the hole.
Then I pricked a hole in the 2 leaves part, pushed the wire through and with a dot of hot glue attached it to the first part.
This is repeated with the 3 leaves part.
The stem was to slender so I added a double folded piece of wire and taped it
together using green florist tape.
I made 5 flowers repeating the above steps.
The branche also has 3 flower buds.
I shape a cone using tin foil and glued it on a double folded wire.
I colored the leaves on the bottom part with green pastels.
Then I glued on the 5 little leaves. Each leave overlapping the previous one a little bit.
I used flower tape for the stems.
Finally I made the branche.
I started with a long piece of taped wire and begin by adding the first flower bud,
wrapping the tape around the two wires.
After a little bit you add another flower bud, wrapping the tape
around all the wires and so on.
The result is a beautiful orchid branche.
With just a sheet of white foamiran and a few other supplies you can make
these lovely flowers which last for a long time.
Thanks for visiting the Crafteezee blog.
Hugs, Henriëtte.


Beautiful and a great explanation. Thank you x
ReplyDeleteThanks so much Carol.
DeleteSo very pretty!! Thanks for sharing!
ReplyDeleteThank you!
DeleteMagnifique tutoriel d'orchidée Phalaenopsis que j'adore.
ReplyDeleteMerci pour vos posts toujours très instructifs.
Qu'en est-il des résultats du challenge d'Avril ?
Bises.
161/5000
Beautiful tutorial of orchid Phalaenopsis that I love.
Thank you for your posts always very informative.
What about the results of the April challenge?
Hugs.
Thank you! I will pass it on about the April challenge.
DeleteStunning orchids and really enjoyed your tutorial, Michelle x
ReplyDeleteThank you Michelle. I appreciate your comment.
Delete